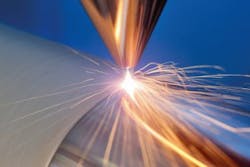
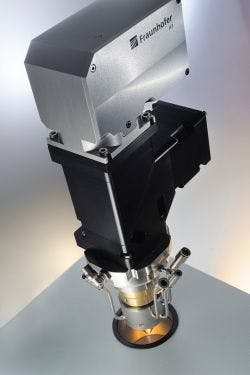
Researchers at the Fraunhofer Institute for Laser Technology (Fraunhofer ILT; Aachen, Germany) have developed an inline system for testing, qualifying, and adjusting the focused powder jet of the nozzles of laser metal deposition (a.k.a. laser material deposition) machines. This system certifies the nozzles and characterizes the caustic completely. A user can also visualize and monitor the process, thanks to the system's camera module with integrated illumination.
Related: Green light-enabled SLM process to allow additive manufacturing of copper
Laser material deposition has already proven itself in various areas, such as repairing tools or applying anti-corrosion coatings. But the result depends considerably on how evenly the laser beam applies the powder since it is difficult to optimally adjust the process parameters, including the speed and volume of the powder feed into the melt pool, which plays a decisive role. Before the process, nozzles and caustics must, therefore, be regularly checked, certified, and calibrated. However, the sequence of these steps has been very complex and cumbersome. "An employee applied a powder trace on a metal sheet, which was then checked by an expert," explains Oliver Nottrodt, project manager for Process Control and System Technology at Fraunhofer ILT. "But only a few specialists can perform this task in reproducible quality."
This unsatisfactory situation motivated the researchers to develop a machine-supported inline process. The system solution consists of three main components: a camera module, movable optics, and illumination, all of which are mounted on the machining head. The nozzle is measured with a laser module, which is placed in the system. Control of these two modules is provided by electronics integrated either in a separate or the machine control cabinet. "For the documentation, it is important to know where the axes of the system are located," Nottrodt explains. "Their exact position can be transferred from the basic machine via common data bus interfaces."
To detect and measure the particle density distribution and caustics of the powder jet, the jet is illuminated with a laser line perpendicular to the powder gas flow and observed by the coaxially arranged camera through the powder nozzle. The system changes the relative position of the laser and the machining head several times for further measurements. Finally, the evaluation of 2000–3000 images shows the statistical distribution of the particles in one plane. "If I use this method to gradually capture the so-called caustics—i.e., the focusing area in which the powder particle beam is bundled—it can be calculated and characterized very precisely in terms of the most important parameters, such as the minimum diameter and the density distribution," Nottrodt explains.
The measuring system enables a user to measure and certify the powder feed nozzles and completely characterize the respective powder jet. It also helps set up the process by taking over a multitude of tasks from the user, such as measuring and marking the positions of the processing laser as well as documenting all work steps. Furthermore, the measuring system uses the geometric characteristics of the melt pool to monitor the laser metal deposition process, which it also visualizes and documents.
At the CONTROL 2018 trade fair, to be held April 24-27, 2018, in Stuttgart, Germany, Fraunhofer ILT will be presenting a camera module with integrated lighting mounted on a typical working head, and will demonstrate how the laser module functions on the computer. Its booth is colocated with the Fraunhofer Alliance VISION, booth 6302 in Hall 6.
For more information, please visit www.ilt.fraunhofer.de.


